Basic Usage
Build a small WPF app with a Mica window, a text box, and a button. Start with a WPF project targeting a supported framework and add Fluence.Wpf as described in installation. These examples use MyApp as the project namespace.
Initialize the application
Remove StartupUri from App.xaml so you can apply Fluence resources before creating the first window:
<Application x:Class="MyApp.App"
             xmlns="http://schemas.microsoft.com/winfx/2006/xaml/presentation"
             xmlns:x="http://schemas.microsoft.com/winfx/2006/xaml" />
In App.xaml.cs, apply the system theme and show the window:
using System.Windows;
using Fluence.Wpf;

namespace MyApp;

public partial class App : Application
{
    protected override void OnStartup(StartupEventArgs e)
    {
        base.OnStartup(e);
        ApplicationThemeManager.Apply(ApplicationTheme.Auto);
        MainWindow = new MainWindow();
        MainWindow.Show();
    }
}
Auto follows the Windows app theme and uses the system accent by default. Theme initialization also loads the control templates; do not merge Generic.xaml yourself.
Create the window
In MainWindow.xaml, set the root to FluenceWindow and declare the Fluence XML namespace. The SystemBackdropType property requests Mica on supported Windows 11 builds. Windows 10 uses the documented fallback.
<fluence:FluenceWindow x:Class="MyApp.MainWindow"
    xmlns="http://schemas.microsoft.com/winfx/2006/xaml/presentation"
    xmlns:x="http://schemas.microsoft.com/winfx/2006/xaml"
    xmlns:fluence="http://schemas.fluencewpf.com"
    Title="My first Fluent window" Width="640" Height="400"
    Background="{DynamicResource ApplicationBackgroundBrush}"
    ExtendsContentIntoTitleBar="True" SystemBackdropType="Mica">
    <fluence:FluenceWindow.TitleBar>
        <fluence:TitleBar Title="My first Fluent window" />
    </fluence:FluenceWindow.TitleBar>
    <StackPanel Width="300" VerticalAlignment="Center">
        <fluence:TextBox x:Name="NameInput" PlaceholderText="Your name" />
        <fluence:Button Content="Say hello" Appearance="Accent"
                        Margin="0,16,0,0" Click="OnSayHello" />
        <fluence:TextBlock x:Name="Greeting" Margin="0,16,0,0" />
    </StackPanel>
</fluence:FluenceWindow>
Set the code-behind base type to match the XAML root:
using System.Windows;
using Fluence.Wpf.Controls;

namespace MyApp;

public partial class MainWindow : FluenceWindow
{
    public MainWindow() => InitializeComponent();

    private void OnSayHello(object sender, RoutedEventArgs e)
    {
        Greeting.Text = $"Hello, {NameInput.Text}!";
    }
}
Run the app and enter a name. DynamicResource keeps the background current when the theme changes. For application state beyond this example, use WPF bindings and commands. Update WPF controls on their owning dispatcher thread.
The completed window in light and dark themes:
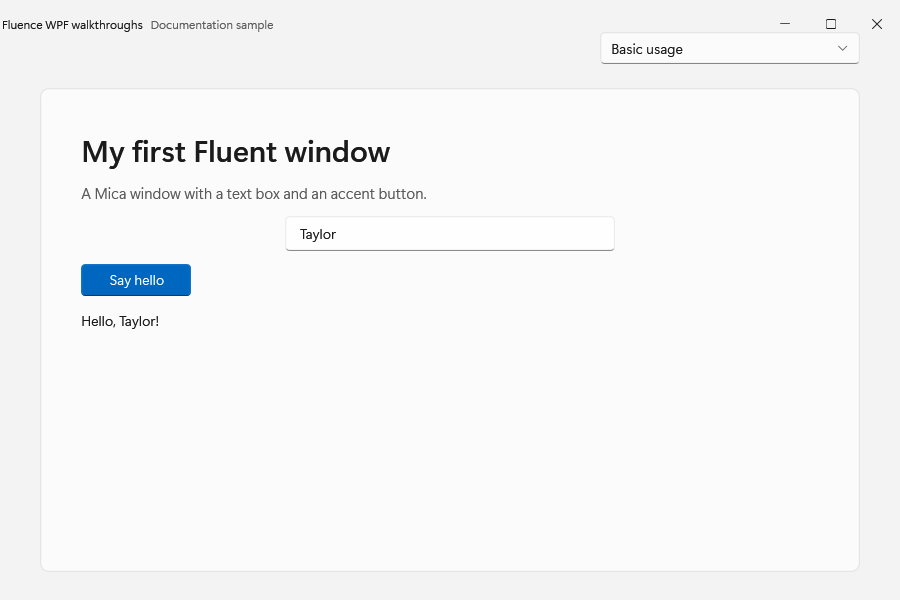
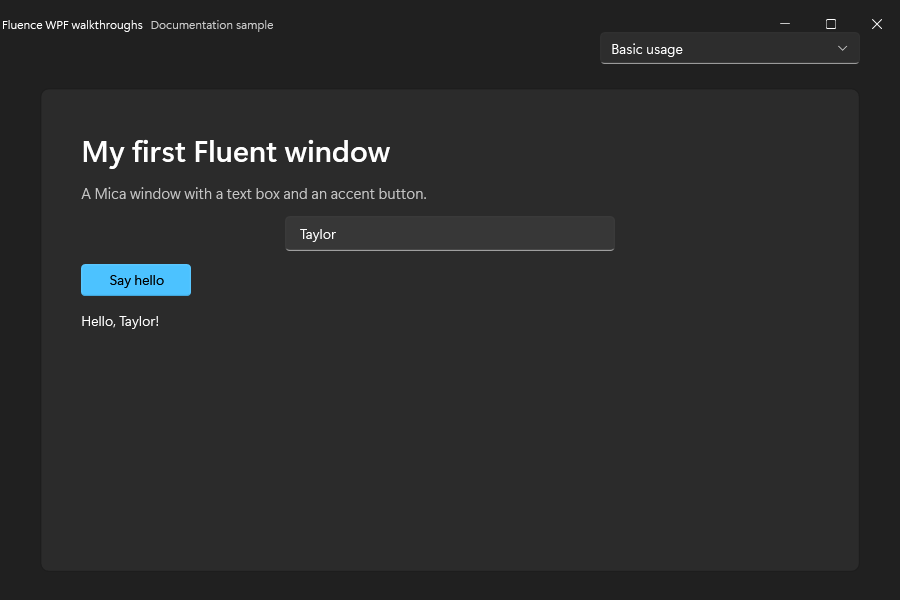
To run this window and the six follow-on scenarios, use the walkthrough sample.
Continue
Choose a walkthrough, browse the control catalog, or run the Gallery to inspect more examples.